If you’re looking for a break from decadent Valentine’s Day noshing, treat yourself to a light and tasty Vietnamese noodle bowl. I know I’ve said it a million times before, but my favorite thing about Vietnamese food is how incredibly fresh and colorful the ingredients are, something I haven’t learned to appreciate until realizing as a grown adult that fresh food is exceedingly difficult to incorporate into daily working life. Not only are Vietnamese dishes super healthy and light, but you never have to sacrifice flavor for healthiness. A fat-free comfort food? Count me in! Bún, the Vietnamese word for rice noodles, issuper easy to make and a great way to incorporate some leftover meat with fresh herbs and veggies. In this dish, my meat of choice was a spicy lemongrass pork but the recipe works well for all types of meat and even tofu. Sorry prospective Valentines, nothing comes between me and my bún.

Lemongrass Pork Noodle Bowl (Serves 2)
• 1 lb pork tenderloin
• 2 lemongrass stalks
• 2 cayenne peppers, sliced
• 4 garlic gloves, minced
• 1 1/2 tsp sugar
• 1 tsp salt
• 1/2 tsp ground black pepper.
• 2 servings rice vermicelli, prepared
• sesame oil
• Thai basil
• mint
• ladythumb
• pickled carrots
• fried shallots
• peanuts
• fresh lime
• prepared fish sauce

1. Chop lemongrass as finely as possible. You may be able to better achieve this texture using a food processor.

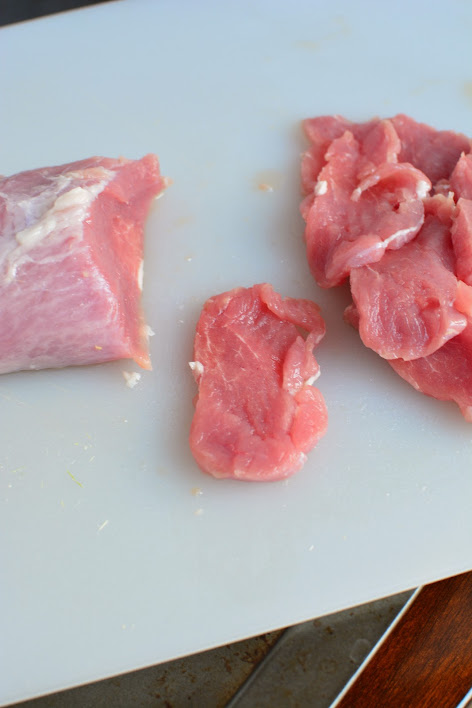
2. Slice pork tenderloin into 1/4 inch cuts.

3. In a skillet, heat sesame oil and stir fry lemongrass, garlic and cayenne peppers until golden brown.

4. Add in sliced pork and saute with sugar, salt and ground pepper for about 10 minutes or until meat is no longer red. I like frying the pork for a little longer to get a sweet, charred taste. 

5. Serve over rice noodles and garnish with herbs, pickled carrots, fried shallots, peanuts and a fresh lime wedge. To prepare pickled carrots, use a mandoline to slice them thinly and microwave in 1-2 cups of vinegar. Feel free to add or remove any garnishes; in my opinion, the more the merrier! Don’t forget to top it all off with fish sauce. It’s the secret ingredient that ties everything together!

I was feeling a bit under the weather this weekend and desperately craving some chicken pot pie. Whenever I was sick growing up, my dad would pick one up on his way home from work and I swear it had magical healing properties. Instead of making one big pot pie for myself, I decided to make mini ones to share with my boyfriend. After all, he deserves a little something special for taking such good care of my body and soul. Maybe it’s because I’m a mini human, but there’s just something about bite sized versions of food that make smile. From a practical perspective, bite sized foods are easy to share with friends, a hit at parties, and quite frankly the most efficient way to clear your plate. I may not be able to eat an entire pizza upon first glance, but cut that baby up into tiny slices, and I’ll gobble them all up one by one. From a personal perspective, small foods take me back to my childhood tea parties of stuffed animal company and make me think about the things I’ll make for a mini-me someday. Anyway, I added a little curry and coconut milk into an otherwise classic chicken pot pie filling and stuffed them into some canned biscuits and voila – bite sized comfort in a muffin tin.

Mini Curry Chicken Pot Pies (Yields 12)
• 1 can extra large biscuits
• 3 chicken breasts, diced into 1/4 inch cubes
• 6 cloves garlic, minced
• 5 cayenne peppers, chopped
• 4 lemongrass stalks, chopped into 2 inch pieces
• 1 small onion, diced
• 1 cup mixed peas and carrots, frozen or canned
• 1/2 cup coconut milk
• 3 tbsp sesame oil
• 2 tbsp chicken stock
• 1 tbsp yellow curry
• 2 tsp sugar
• 1 tsp salt
• 1 tsp ground black pepper

1. In a skillet, saute garlic, lemongrass, onions and cayenne peppers in sesame oil. Stir fry for 5 minutes until onions become translucent.

2. Add in chicken broth, diced chicken, peas and carrots, curry, sugar, salt and black peppers. Continue stirring until chicken is cooked, about 6-8 minutes.

3. Reduce heat and remove lemongrass stalks from pan. Add in coconut milk and stir on low heat until evenly mixed. Remove from heat and set aside.

4. Preheat oven to 400 degrees. Use a rolling pin or glass to flatten canned biscuits into a 5 inch wide circle.

5. Press flattened biscuits into a nonstick muffin pan, leaving about a 1/2 inch rim outside the edge of the muffin pan.

6. Spoon 1/4 cup of curry chicken mixture into biscuit cups.

7. Pull the edge of the biscuits from four sides and pinch a knot in the middle. Bake for 20 minutes.

After a good run of tasty but rich appetizers leading up to the Superbowl, it’s time to bring back some healthy entrees. With all the snow we’ve been getting lately in Madison, I figured it would be a good time to make good use of my oven. Add a unique twist to baked fish with a crispy wasabi pea crust.

Crispy Wasabi Pea Crusted Cod (Serves 4)
• 4 cod fillets
• 1 cup wasabi peas
• 1 tsp salt
• 1 cup mayonnaise
• 2 tsp lime juice
• 1 tsp ground black pepper
• 1 tsp wasabi powder
• 1 tsp garlic powder

1. Place wasabi peas and salt into a food processor and crush into a breadcrumb like consistency. If you don’t have a food processor, place peas into a ziploc bag and smash with pan.

2. Mix together mayonnaise, lime juice, black pepper, wasabi powder and garlic powder.

3. Dip cod fillets into mayonnaise sauce and coat in wasabi pea crumbs.

Wasabi Pea Crusted Cod

4. Place cod fillets on a foil-lined baking pan and bake for 35 minutes at 450 degrees.

The inspiration behind this recipe was mere happenstance. I had actually gone to the grocery store to pick up some milk and a “Jalapenos: 10 for $1” sign caught my eye. Being a sucker for a good bargain, I picked some up, trying to brainstorm how I could possibly use up ten jalapenos. As I continued to peruse through the grocery store, cream cheese was also on sale and the rest is history. However, while the discount deities were kind to me that evening, the good old fashioned common sense gods were not on my team. I was not only too lazy to wear gloves while removing the seeds from my peppers but I also instinctively scratched my nose while doing so, leading to a most painful half hour trying to cool off my nose. Moral of the story: the crab rangoon poppers were delicious and worth the entire ordeal (but actually, use gloves whenever working with peppers, even the seemingly mild ones!).

Crab Rangoon Jalapeno Poppers (Serves 4)
• 6 jalapeno peppers
• 1 8oz package cream cheese, softened
• 1 6oz can lump crab meat, or 1 cup chopped imitation crab
• 2 tsp sugar
• 1 tsp ground ginger
• 1 tsp ground black pepper
• 1/2 cup panko bread crumbs
• chopped green onions, for garnish

1. Preheat oven to 450 degree. Slice jalapenos in half lengthwise and remove seeds. Use gloves to remove seeds. Better safe than sorry!

2. Mix together softened cream cheese, crab meat, sugar, ginger, and black pepper.

3. Spoon filling generously onto jalapeno halves.

4. Sprinkle panko bread crumbs over poppers.

5. Bake for 35 minutes and broil for an additional 2 minutes. Serve hot! These taste great on their own or with a classic duck sauce (don’t we all have those Chinese sauce packets laying around somewhere?).